
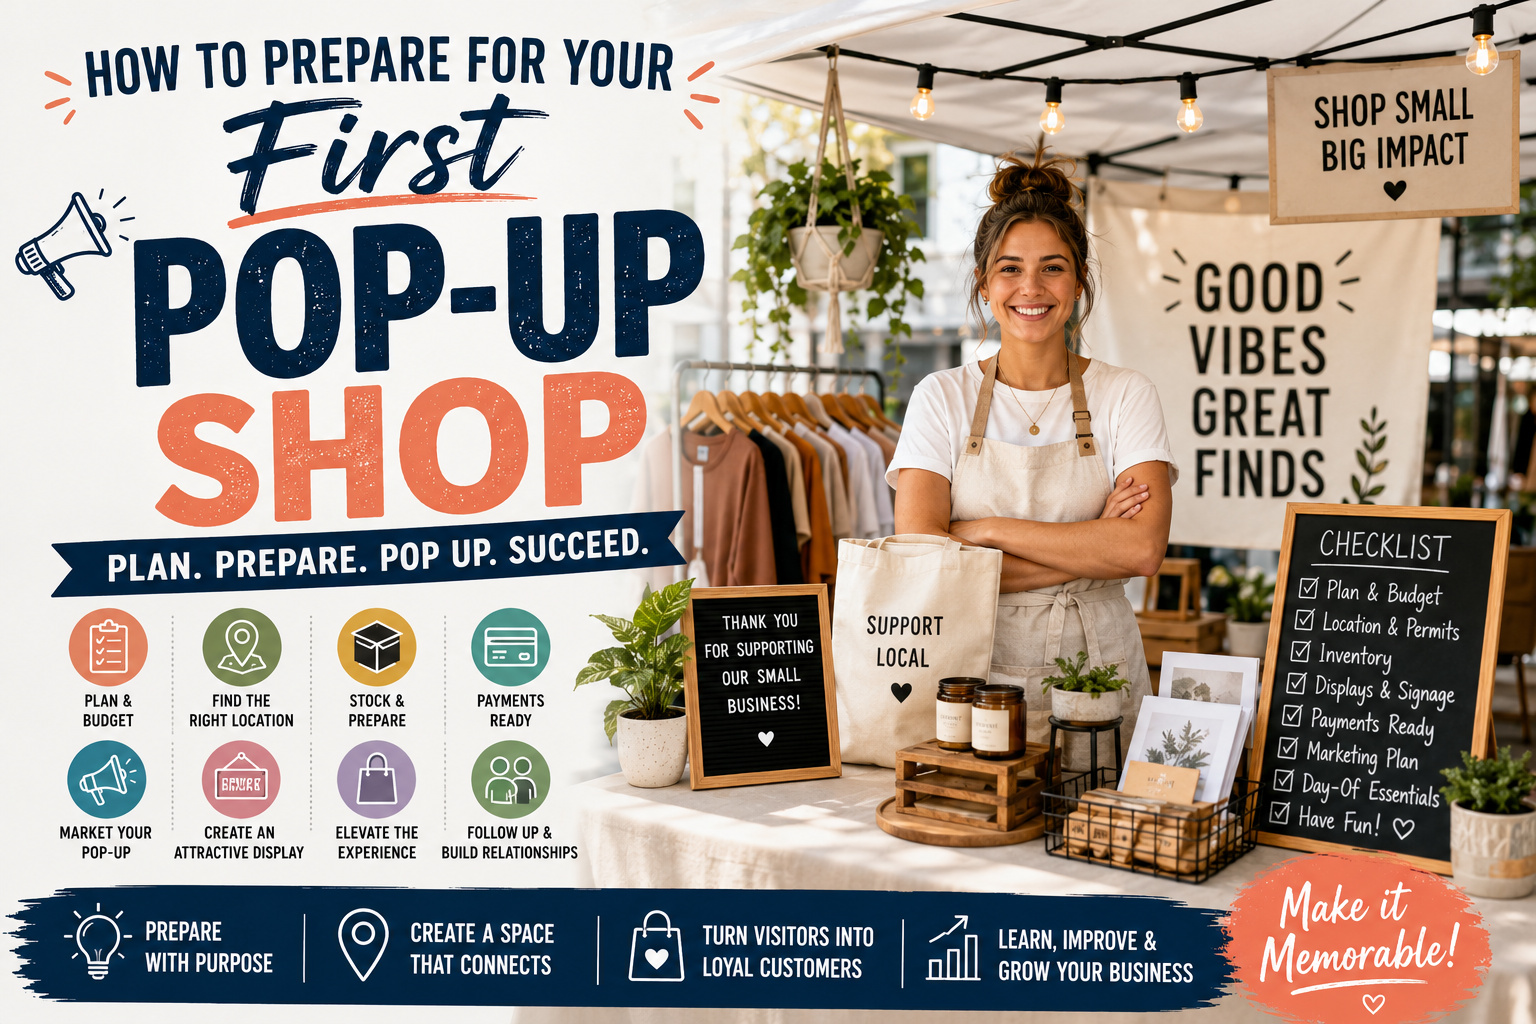
TLDR
Your first pop-up shop needs more than products and a folding table.
Before opening, make sure you have:
- A clear goal and realistic budget
- A location that reaches the right customers
- Required permits, insurance, and event documents
- Enough inventory, packaging, and display supplies
- Visible signs and clearly marked prices
- A tested card reader and backup payment method
- A simple marketing plan
- A day-of tool and emergency kit
- A plan for collecting customer information
- A way to measure sales and follow up afterward
Set up the complete shop at home before the event. A practice run will reveal missing signs, unstable displays, crowded tables, and cables that appeared much shorter in the package.
A pop-up shop can turn an online brand or home-based business into something customers can walk into, touch, and remember. It can also test a new product, neighborhood, price point, or retail concept without committing to a permanent storefront.
But temporary does not mean effortless.
Learning how to prepare for your first pop-up shop involves choosing the right location, planning inventory, testing your payment equipment, creating a clear retail display, and packing for small problems before they become large ones. The goal is to create a temporary space that feels organized and intentional rather than assembled from whatever happened to fit in the car.
Decide What the Pop-Up Shop Should Accomplish
Start with one primary goal.
A pop-up shop can help you:
- Generate immediate sales
- Introduce a new product
- Test demand in a new area
- Meet online customers in person
- Grow an email or SMS list
- Create brand awareness
- Collect product feedback
- Find wholesale accounts
- Build content for social media
- Test a future retail location
Square describes pop-up shops as temporary retail locations that can range from market stalls to short-term storefronts. Businesses commonly use them to build awareness, introduce products, and reach customers in person.
Your goal affects nearly every other decision.
A sales-focused pop-up needs reliable inventory, efficient checkout, and products customers can take home immediately. A launch event may put more emphasis on demonstrations, samples, photography, and email signups.
Write down the main goal and two or three supporting measurements.
For example:
Primary goal: Sell at least $2,500 in merchandise
Secondary goals: Collect 75 email addresses and identify the three most popular products
A specific goal makes it easier to decide what deserves space, money, and attention.
Choose the Right Pop-Up Format
Not every pop-up shop needs an empty storefront.
Common formats include:
- A booth at a market or festival
- A table inside another retailer
- A shop-within-a-shop
- A temporary mall space
- A shared space with several brands
- A mobile trailer
- A studio open house
- A seasonal retail unit
- A one-day warehouse sale
- A short-term vacant storefront
A market booth is often the easiest first step because the organizer may already provide foot traffic, event promotion, and basic rules. A private storefront offers more control but usually requires more planning, equipment, and expense.
Think about what the customer needs to experience.
A clothing company may need fitting space and mirrors. A candle brand needs enough room for customers to smell products without mixing every scent together. An artist may need upright displays and safe storage for prints. A packaged-food business may need sampling supplies and temperature control.
Choose the simplest format that supports the product.
Evaluate the Location Carefully
A busy location is not automatically a good location. The traffic needs to include people who are likely to buy what you sell.
Before committing, investigate:
- Expected attendance
- Customer demographics
- Nearby businesses
- Parking
- Public transportation
- Pedestrian traffic
- Loading access
- Accessibility
- Restrooms
- Electricity
- Wi-Fi or cellular reception
- Lighting
- Security
- Weather protection
- Storage
- Hours and setup restrictions
Shopify defines a pop-up shop as temporary retail space operating for a limited period, often in an existing retail location, market, or high-traffic area. It recommends choosing a format and location that fit the audience and purpose of the event.
Visit the location at the same time and day of the week that your pop-up will operate. A street that looks active on Friday evening may be nearly empty on Sunday morning.
For an organized event, ask the host for attendance numbers from previous years. Treat projected attendance as an estimate, not guaranteed foot traffic.
Confirm Permits, Taxes, Insurance, and Event Rules
Do not assume a temporary shop is exempt from normal business requirements.
The licenses and permits required may depend on:
- State
- County
- City
- Product type
- Event location
- Length of operation
- Food or beverage service
- Use of temporary signs
- Whether employees will work
- Whether sales tax applies
The U.S. Small Business Administration notes that state, county, and city requirements depend on business activity and location. Local licenses and permits may apply even when the business is already registered elsewhere.
Ask the organizer or property owner about:
- Vendor agreement
- Certificate of insurance
- Seller’s permit
- Sales tax registration
- Food handling permits
- Fire rules
- Occupancy limits
- Temporary sign restrictions
- Music licensing
- Product restrictions
- Setup and teardown hours
- Required table or canopy weights
- Waste disposal
- Cancellation policies
Keep printed and digital copies of important documents. Place the printed copies in a waterproof folder that remains at the shop.
Create a Complete Pop-Up Budget
It is easy to focus on the rental fee and overlook the smaller costs surrounding it.
Your budget may include:
| Expense Category | Possible Costs |
|---|---|
| Space | Vendor fee, rent, security deposit |
| Permits | Business license, event permit, sales permit |
| Insurance | Event or general liability coverage |
| Display | Tables, shelves, racks, lighting, mirrors |
| Inventory | Product manufacturing and restocking |
| Staffing | Wages, payroll costs, meals |
| Payments | Card-processing fees, hardware, cash supplies |
| Marketing | Printed materials, ads, photography |
| Packaging | Bags, boxes, labels, tissue paper |
| Transportation | Fuel, parking, trailer rental |
| Utilities | Electricity, internet, extension cords |
| Cleanup | Trash bags, cleaning products, disposal fees |
| Backup | Replacement equipment and emergency supplies |
Include a buffer for unexpected expenses. A missing extension cord is inexpensive. Buying five display fixtures the night before opening is less so.
Your sales goal should account for product costs and event expenses. Gross revenue alone does not show whether the pop-up was profitable.
Plan Inventory Around the Event
First-time vendors often bring either far too much inventory or not enough variety.
Start with:
- Expected attendance
- Average product price
- Length of the event
- Past online sales
- Seasonal demand
- Available storage
- Display capacity
- Ability to restock
Bring enough product to keep the display looking active, plus organized backup inventory.
Do not place every unit on the table. A crowded display can make shopping harder, and it leaves nowhere to put purchased products, samples, or checkout equipment.
Group inventory by category, size, color, scent, or design. Label each storage bin so staff can restock quickly.
Create a simple inventory sheet that records:
- Starting quantity
- Units sold
- Damaged items
- Samples used
- Complimentary products
- Remaining inventory
This will tell you more than total sales alone. A product that received attention but few purchases may have a pricing, packaging, or positioning issue.
Design a Shop Customers Can Understand Quickly
Someone approaching the space should be able to answer three questions within a few seconds:
- What does this business sell?
- How much do the products cost?
- Where should I begin?
Use display height to create structure. Tables filled with products at one level can look flat and overwhelming.
Useful display supplies include:
- Shelves
- Risers
- Crates
- Baskets
- Pegboards
- Grid walls
- Garment racks
- Sign holders
- Acrylic stands
- Mirrors
- Table coverings
- Product trays
- Small lights
Place bestsellers and visually strong products near the front, but keep enough room for people to enter without feeling trapped.
Create a natural path through the display. Customers should be able to browse, pick up a product, read the package, and return it without knocking over the neighboring collection.
Square’s vendor setup guidance recommends organizing display materials, inventory, payment equipment, signs, marketing pieces, and personal supplies before the event. It also suggests loading in the reverse order of setup so foundational display pieces come out first.
Make the Brand Visible From a Distance
Your business name should not be hidden behind products or displayed only on a business card near the checkout device.
Use a clear main sign that includes:
- Business name
- Logo
- Short product description
- Recognizable brand colors
Smaller signs can explain:
- Prices
- Product ingredients
- Sizes
- Bundle offers
- Care instructions
- Payment methods
- Custom-order availability
- Social media information
Price every item or product group. Some customers will ask when a price is missing. Others will assume it is expensive and leave quietly.
Keep the visual identity consistent across signs, packaging, staff apparel, and printed materials. The shop does not need to resemble a permanent boutique, but it should feel like one recognizable business.
Use Branded Stickers Throughout the Experience
Stickers can serve several purposes at a pop-up shop without taking up much storage space.
You can use durable branded giveaways as:
- Free items with purchase
- Package seals
- Loyalty rewards
- Event exclusives
- Product samples
- Display decoration
- Logo handouts
- Limited-edition merchandise
CustomStickers.com prints custom vinyl stickers with a weatherproof, UV-resistant laminate intended to protect the design from water, scratches, and sunlight.
A giveaway sticker does not need to be a plain logo. Customers are more likely to use a design that includes an illustration, mascot, local reference, funny phrase, or event-specific artwork.
You can still place the business name or website within the design, but the sticker should offer something beyond a miniature advertisement.
Prepare Printed Materials for Different Types of Customers
Not every visitor will buy during the event.
Some people may want to:
- Visit your website later
- Place a custom order
- Discuss wholesale pricing
- Book a service
- Follow your social account
- Attend another event
- Share your information with a friend
Use different printed pieces for different jobs.
Full-color promotional handouts can explain an event offer, menu, service list, or upcoming launch. CustomStickers.com offers full-color flyer printing for promotions, announcements, handouts, and local marketing campaigns.
Professionally printed contact cards are useful for wholesale buyers, event organizers, custom inquiries, and customers who want to shop later.
For something less traditional, adhesive networking cards combine contact information with a removable branded sticker. CustomStickers.com positions these for events, meetings, networking, and business promotion.
Do not hand every customer five different pieces of paper. Choose the item that matches the conversation.
Make Packaging Part of the Display
Packaging should protect the product, support the brand, and make purchases easy to carry.
Bring:
- Shopping bags
- Product boxes
- Tissue paper
- Protective sleeves
- Glassine bags
- Bubble wrap
- Tape
- Thank-you cards
- Care instructions
- Receipts
- Return information
Use custom product and packaging stickers to identify products, seal bags, add logo branding, or distinguish scents, flavors, and variations.
Prepare packaging before the event when possible. Folding boxes, applying labels, and cutting ribbon while customers wait slows checkout.
Also plan for awkward products. Large artwork, plants, glass jars, clothing, and fragile items may need more protection than a standard paper bag provides.
Set Up Reliable Payment Processing
Test your payment system before leaving home.
Your checkout kit should include:
- Mobile POS device
- Card reader
- Phone or tablet
- Chargers
- Portable power bank
- Personal hotspot
- Cash pouch or cash box
- Small bills
- Receipt paper
- Sales tax settings
- Backup payment app
- Manual transaction log
Square and Shopify both identify mobile point-of-sale systems as a practical way to accept payments and connect in-person sales with inventory records at temporary events.
Check cellular reception at the venue. A card reader is less impressive when it becomes an expensive paperweight.
Decide how you will handle:
- Returns
- Exchanges
- Damaged products
- Digital receipts
- Taxes
- Discounts
- Gift cards
- Sold-out products
- Online ordering
Make these decisions before a line forms.
Promote the Pop-Up Before Opening Day
Do not depend entirely on random foot traffic.
Begin promoting the pop-up several weeks in advance when possible.
Your marketing plan might include:
- Email announcements
- Social media posts
- Countdown stories
- Behind-the-scenes videos
- Product previews
- Local event calendars
- Partner promotions
- Paid local ads
- Flyers at nearby businesses
- Influencer or creator invitations
- Customer referral incentives
- Event-exclusive products
Shopify recommends building a pop-up marketing plan around the target audience, event details, social content, email, partnerships, local promotion, and a reason for people to visit during the limited window.
Every promotional message should clearly state:
- Date
- Hours
- Address
- Parking information
- What will be available
- Why the event is worth visiting
Post reminders close to the event. People who were interested three weeks ago may still need to be reminded the morning the doors open.
Create a Reason to Visit Now
A temporary store already has some natural urgency, but the shop should offer a specific reason to attend in person.
Possible pop-up exclusives include:
- New-product preview
- Event-only color or design
- Personalized product
- Free sample
- Gift with purchase
- Bundle pricing
- Live demonstration
- Meet-the-maker session
- Limited sticker
- Local collaboration
The offer does not need to be a large discount.
Exclusive products and experiences can protect margins while making the event feel different from ordinary online shopping.
Be honest about limits. Do not claim an item is exclusive or scarce when it will be widely available the following week.
Run a Complete Practice Setup
Set up the full pop-up at home, in a warehouse, or in a similar-sized space.
Do not simply place the packed boxes beside one another and decide that everything is probably in there.
During the mock setup:
- Assemble every fixture.
- Arrange the full display.
- Add signs and prices.
- Connect the payment equipment.
- Package a sample order.
- Walk through checkout.
- Take photos from the customer’s view.
- Measure the finished footprint.
- Time setup and teardown.
- Test lighting and extension cords.
Shopify recommends conducting a complete mock booth setup, labeling displays and inventory containers, and maintaining a dedicated event tool kit so the setup can be repeated efficiently.
Photograph the completed display. Use those photos as a setup guide on event day.
Pack a Pop-Up Shop Emergency Kit
Small problems are inevitable. Most are manageable when the right tool is nearby.
Pack:
- Scissors
- Utility knife
- Clear tape
- Painter’s tape
- Duct tape
- Double-sided tape
- Zip ties
- Safety pins
- Binder clips
- Pens
- Markers
- Notepad
- Extension cords
- Power strips
- Charging cables
- Batteries
- Basic screwdriver
- Multi-tool
- Cleaning spray
- Paper towels
- Trash bags
- First-aid kit
- Stain remover
- Spare price tags
Keep the kit in one labeled container.
Also pack personal supplies:
- Water
- Snacks or meals
- Medication
- Comfortable shoes
- Extra clothing
- Hand sanitizer
- Phone charger
- Weather protection
- Deodorant
- Breath mints
These details may not appear in the event photos, but they have a noticeable effect on how well the day goes.
Train Anyone Helping at the Shop
Friends and family can be useful help, but they still need basic instructions.
Every person working the pop-up should know:
- Product names
- Prices
- Bestsellers
- Common customer questions
- Checkout process
- Discount rules
- Return policy
- Restocking system
- Who can approve exceptions
- How to handle custom requests
- Where personal items are stored
Give staff a short description of the business that they can repeat naturally.
Avoid opening with an aggressive sales pitch. Greet customers, give them space to look, and remain available for questions.
A pop-up should feel active and welcoming. Staff sitting behind the table while staring at their phones makes the shop feel closed even when it technically is not.
Collect Customer Information Respectfully
One of the most valuable parts of a pop-up shop is the chance to stay connected with visitors.
You might collect:
- Email addresses
- SMS signups
- Social follows
- Custom-order requests
- Wholesale contacts
- Product feedback
- Future event interest
Explain what customers will receive.
“Join our list” is vague.
“Get restock notices and upcoming market dates” is clearer.
Do not automatically add everyone who makes a purchase to promotional email without the appropriate permission. Keep transaction communication and marketing consent separate.
A giveaway can encourage signups, but the prize should attract people who may genuinely care about the business. A broadly desirable prize may collect many names and very few future customers.
Measure More Than Total Sales
After the shop closes, review:
- Gross sales
- Net sales
- Average transaction value
- Units sold
- Bestselling products
- Slow-moving products
- Peak hours
- Foot traffic
- Conversion rate
- Email signups
- Social follows
- Wholesale leads
- Custom-order requests
- Event costs
- Net profit
Square recommends measuring both financial and nonfinancial results, including sales, customer information, product performance, and the value of testing a market or concept.
Record observations while they are fresh.
For example:
- Customers repeatedly asked for a smaller size.
- The front table blocked entry.
- The QR code was too low to scan comfortably.
- One price sign was unclear.
- Product bundles sold better after noon.
- Saturday evening traffic was much stronger than Sunday morning.
These notes will make the second pop-up easier.
Follow Up After the Event
The pop-up is not finished when the displays are packed.
Within a few days:
- Thank attendees.
- Send promised discount or product links.
- Contact wholesale leads.
- Reply to custom-order inquiries.
- Share event photos.
- Announce remaining inventory.
- Ask for feedback.
- Update inventory records.
- Review expenses.
- Save display notes.
- Confirm the next event, when appropriate.
Customers may have discovered the business at the pop-up but prefer to purchase online later.
Make that transition easy. Your receipts, cards, packaging, emails, and social profiles should all lead customers back to one clear place.
First Pop-Up Shop Checklist
Planning
- Define the main goal.
- Set a budget.
- Choose the format.
- Confirm the location.
- Sign the vendor or rental agreement.
- Check licenses, permits, tax, and insurance.
- Establish event measurements.
Products and Displays
- Plan inventory.
- Label storage bins.
- Build the display.
- Add product prices.
- Prepare backup stock.
- Pack lighting, shelves, and table covers.
- Complete a practice setup.
Branding and Marketing
- Prepare the main sign.
- Print flyers and business cards.
- Order branded stickers.
- Create package labels.
- Promote the event online.
- Contact partners.
- Prepare an email or SMS signup.
Checkout
- Test the POS system.
- Charge every device.
- Pack a power bank.
- Confirm sales tax settings.
- Bring cash and change.
- Prepare receipt options.
- Review return and exchange rules.
Day-of Supplies
- Emergency tool kit
- Cleaning products
- Trash bags
- Food and water
- Comfortable clothing
- Important documents
- Staff instructions
- Setup photos
After the Event
- Count remaining inventory.
- Review sales.
- Contact leads.
- Thank customers.
- Record lessons.
- Store supplies together.
- Decide what to repeat or change.
Final Thoughts
Preparing for your first pop-up shop is mostly an exercise in removing uncertainty.
Know what the event should accomplish. Confirm the rules. Test the location, inventory, displays, payment system, packaging, and customer flow before opening day.
Then give people a reason to stop.
A clear sign, well-organized products, easy prices, useful printed materials, and a small branded takeaway can make a temporary space feel complete. And even when the first pop-up is not perfect, it should give you something valuable: real information about how customers respond to the business in person.