
TLDR
Successful restaurant staff uniform printing starts with a role map, not a shirt catalog. Decide what each position needs to wear, which elements should remain consistent across the restaurant, and where functional differences are necessary. Then record exact garment styles, colors, decoration details, sizes, issue quantities, care requirements, and approved substitutions. That documentation prevents a routine reorder from turning into a redesign.
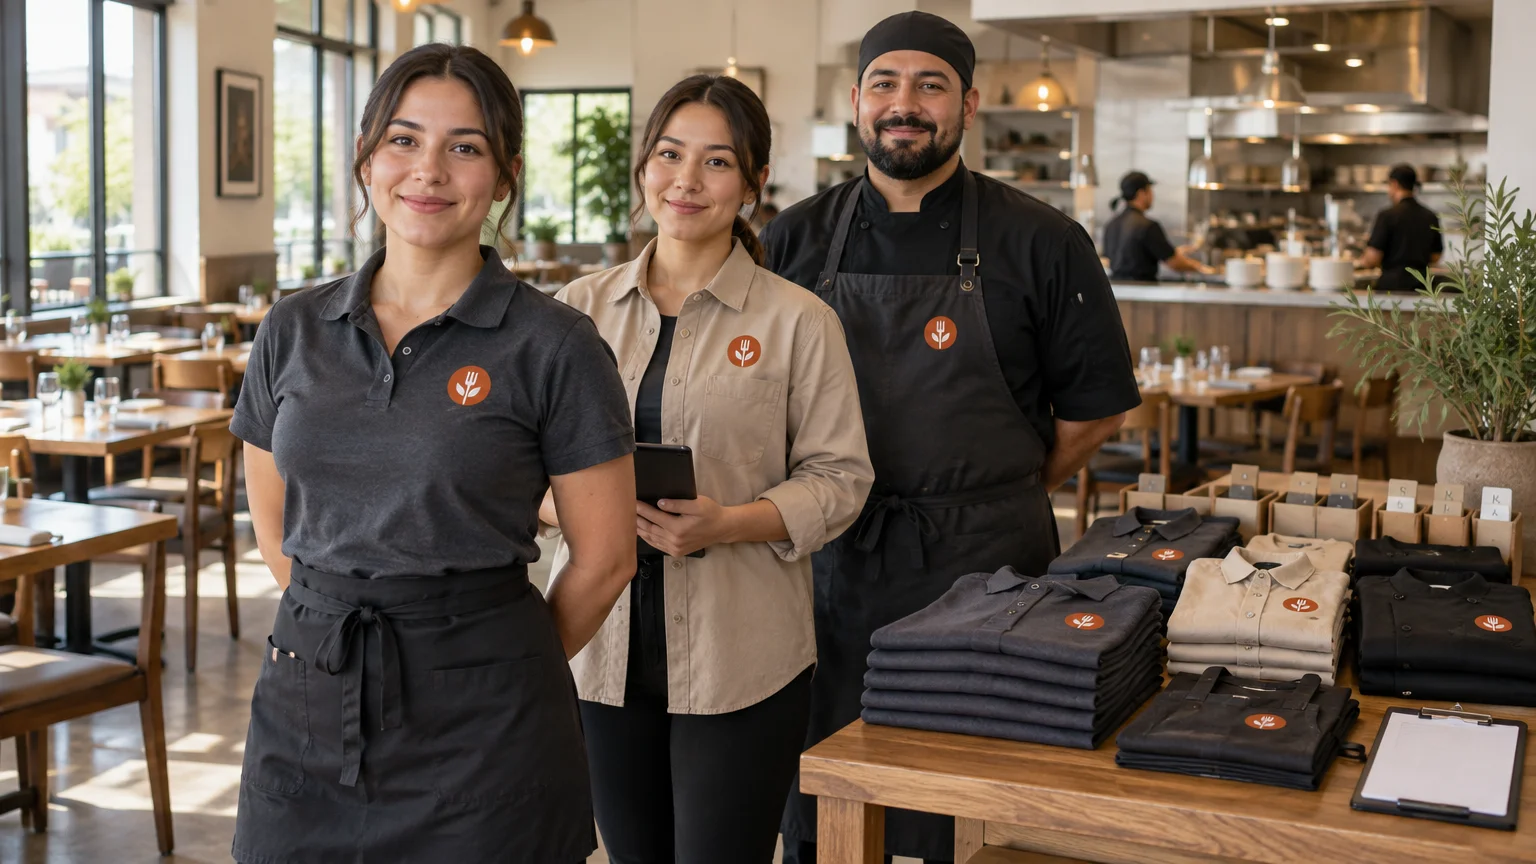
The goal of restaurant staff uniform printing is not to make every employee look identical. It is to create a recognizable system that works for hosts, servers, bartenders, managers, runners, dish staff, and cooks without ignoring the different conditions in which they work.
What restaurant staff uniform printing should accomplish
A useful restaurant uniform program has three jobs. It should make employees easy to identify, suit the tasks assigned to each role, and remain practical to reorder. Branding matters, but it has to coexist with movement, heat, spills, laundering, pockets, apron coverage, and staff turnover.
Start by separating standards from choices. Standards are the elements employees or locations must follow, such as an approved black polo with a left-chest logo. Choices are controlled options, such as two approved fits or a long-sleeve alternative. This gives employees reasonable options without letting the program drift into unrelated garments and shades.
Restaurants developing a program from scratch can also use the broader workflow in this guide to creating custom uniforms for a small business. For a restaurant-specific order, the next step is to translate that workflow into role kits.
Map the team by role before choosing garments
List every role, including positions that may be overlooked because only one or two people fill them. Note whether each employee is guest-facing, works near heat or food preparation, carries tools or order devices, wears an apron, or moves regularly between front-of-house and back-of-house areas.
| Role group | Garment priorities | Possible visual distinction |
|---|---|---|
| Hosts and servers | Presentable through a full shift, comfortable movement, compatible with apron or order device | Core shirt color, consistent chest logo, role-specific apron |
| Bartenders and runners | Mobility, useful pockets, garments that work under an apron | Same core shirt with a different apron style or accent |
| Managers | Easy identification without breaking the brand system | Related polo, button-front shirt, jacket, or restrained secondary color |
| Cooks and prep staff | Movement, workplace conditions, laundering practicality, apron compatibility | Kitchen-specific shirt or coat using the same logo system |
| Dish and utility staff | Coverage, movement, replacement practicality, demanding wash cycle | Simplified approved garment in a coordinated color |
This table is a planning framework rather than a universal dress code. A café with an open kitchen may want close visual coordination between all roles. A formal dining room may need a sharper front-of-house layer and a separate kitchen system. Document employees who cross roles so they receive a kit that works in both areas rather than two incomplete sets.
Coordinate front and back of house without forcing a match
FOH and BOH uniforms can belong to one visual system without using the same garment. Keep two or three elements consistent: the logo treatment, a core color family, and perhaps an apron or headwear accent. Allow the garment itself to change when the work changes.
For example, servers might wear a dark polo with a waist apron, while kitchen staff wear a lighter kitchen shirt with a full bib apron. Using the same one-color logo on both garments can connect the team visually. Managers could use the server color in a different garment style, making them identifiable without introducing a third unrelated uniform.
Avoid using tiny color differences as the only role signal. Under warm dining-room lighting, two similar dark shades may be difficult to distinguish. Garment type, apron shape, trim, or an approved name badge can communicate a role more reliably.
Choose colors for contrast and maintenance
Evaluate uniform colors against the restaurant interior, logo, apron, and likely working conditions. A logo that looks strong on a white proof may disappear on a mid-tone shirt. Request a decoration proof showing the actual garment color, decoration color, and intended position together.
Dark garments can create a consistent FOH appearance, but no color eliminates maintenance concerns. Lint, flour, grease, sauces, cleaning products, and fading affect colors differently. If the restaurant uses commercial laundering or particular cleaning agents, confirm that the garment and decoration are compatible with the actual process before approving the full order.
Color continuity is also an inventory issue. Garment colors can be discontinued. One SanMar polo listing, for example, includes discontinued color options, which illustrates why a reorder should begin with an availability check rather than an assumption that last year’s shade still exists. Choose an approved fallback color or garment before a shortage forces a rushed substitution.
Select shirts, polos, chef coats, and aprons by task
Choose garments while employees are wearing the full kit. A polo that feels comfortable alone may pull at the shoulders when combined with a tightly tied bib apron. A long shirt may bunch below a waist apron. A chest pocket may sit exactly where the logo was planned.
- T-shirts can suit casual concepts and layered kitchen uniforms, but collar and fit standards still need to be defined.
- Polos provide a structured collar while retaining much of the familiarity of a knit shirt. Check placket construction, vents, pocket options, and size range.
- Button-front shirts can support a more formal FOH look, but the program should account for tucking, sleeve options, and pressing or laundering.
- Chef coats and kitchen shirts should be selected around the restaurant’s actual working conditions, dress policy, closure preferences, and laundering process.
- Waist aprons keep the upper shirt and chest logo visible and may suit roles that need quick pocket access.
- Bib aprons provide more torso coverage but can hide shirt decoration, making the apron itself the more logical logo location.
Do not record an item merely as “black apron.” Product-specific details can materially change use. SanMar, for example, lists its A500 full-length apron as 7-ounce cotton twill with stain-release protection, an adjustable neck strap, patch and pen pockets, and dimensions of 22 by 30 inches. Whether or not that item is chosen, the example shows the level of specificity a useful purchasing record should retain.
Match the decoration method to the design and garment
Choose decoration after selecting the garment and deciding where the logo must appear. Embroidery can suit polos, structured shirts, coats, aprons, and some headwear, but dense stitching adds weight and may not reproduce very small lettering cleanly. Printed or transferred graphics can be useful for larger artwork, lightweight garments, or designs requiring more visual detail. The right choice depends on the fabric, seams, pockets, artwork, order structure, laundering, and desired feel.
Ask the decorator to evaluate the actual garment rather than approving a method from the logo file alone. For DTF heat transfers, STAHLS advises against artwork dependent on soft or faded edges and transparency. It also notes that RGB screen colors may not reproduce as expected. A production-ready file should therefore use deliberate edges, suitable color values, and text large enough for the selected process.
Simplification often improves consistency. A detailed restaurant crest may work on signage but lose clarity as a small chest mark. Consider an approved compact version for uniforms while preserving the complete logo for menus and larger applications. Record which artwork version belongs at each placement.
Build a logo-placement hierarchy
Choose one primary placement for most garments, then define exceptions. The left chest is a common starting point because it remains visible on many shirts and polos, but pockets, seams, apron bibs, and name badges can interfere. A centered apron-bib logo may be more visible than shirt decoration that the apron covers.
- Shirts and polos: specify left or right chest, artwork width, and its relationship to pockets or plackets.
- Chef coats: account for closures, chest pockets, ventilation panels, and any name embroidery.
- Bib aprons: place artwork where it remains visible when the neck and waist straps are adjusted.
- Waist aprons: use decoration only when it will be visible and will not conflict with pockets or heavy wear areas.
- Headwear: approve a simplified mark that suits the available decoration area rather than shrinking the full logo automatically.
- Back prints: reserve them for situations where distance visibility or promotional messaging serves a clear purpose.
Use a placement diagram or approved sample instead of relying on phrases such as “standard chest position.” Garment size and construction can change how the same coordinates look. The practical tradeoffs among chest, back, sleeve, and front placements are covered further in this work-shirt logo placement guide.
Collect sizes for the exact garment style
Do not convert employees into a “usual size” and assume that size applies across every garment. Collect sizes only after selecting the exact style, then give staff access to its current manufacturer chart. A try-on set is especially useful when the program includes different fits, unfamiliar garments, or a wide size range.
Manufacturer records also protect reorders. SanMar lists one Port Authority Rapid Dry polo style in sizes XS through 6XL and identifies it as a 5.6-ounce cotton/poly polo with moisture-wicking construction and side vents. Those details belong to that particular style; another polo carrying the same nominal size or similar description may fit and perform differently.
- Choose the exact garment style and approved fit options.
- Share the matching manufacturer size chart or arrange a try-on.
- Record each employee’s selected size by style, not as a universal profile.
- Confirm whether every approved color is available across the required size range.
- Recheck the chart if the manufacturer changes the style or an alternative garment is introduced.
Plan role kits, replacements, and new-hire stock
Set issue quantities from operating conditions rather than copying another restaurant. Shift frequency, laundering turnaround, turnover, spill exposure, storage, and reorder lead time all affect the right number. An employee working five shifts between laundry cycles needs a different kit from a weekend host.
Create a baseline kit for each role, then add replacement logic. For example, a server kit might specify approved shirts, waist aprons, and an optional layer, while a kitchen kit specifies shirts or coats, bib aprons, and required headwear. Keep spare stock in the sizes the current team and hiring pattern actually use, but avoid filling storage with speculative quantities of a garment that may later be discontinued.
Assign one person to issue garments and update inventory. A simple log should show the employee, role, style, color, size, quantity, issue date, and reason for any replacement. That record makes recurring size shortages and unusually fast garment wear visible.
Create a uniform specification sheet for reorders
The reorder file is the operational center of the program. Save it somewhere accessible to the restaurant and purchasing team rather than leaving the only copy with an individual manager or decorator.
- Supplier and exact garment brand, product name, and style number
- Approved color name and any internal color reference
- Current manufacturer size chart and the date it was retrieved
- Role or location assigned to the garment
- Artwork filename, version, and approved color values
- Decoration method, dimensions, thread or ink colors, and placement diagram
- Photograph or physical sample of the approved result
- Care instructions and known laundering requirements
- Employee size and issue records
- Minimum stock levels and reorder approval process
- Approved substitute garment or the steps required to qualify one
Treat substitutions as a controlled change. Compare fabric, weight, shade, fit, available sizes, collar or pocket construction, and decoration result. Approve a sample when the visual difference would be noticeable alongside existing uniforms.
Keep food-safety and footwear rules separate from branding choices
A decorated uniform plan must fit the rules that apply to the workplace. The FDA Food Code 2022 states that food employees must wear clean outer clothing to help prevent contamination and includes requirements for effective hair restraints with specified exceptions. The FDA describes the Food Code as a model for food-safety regulation, so enforceability depends on adoption by the relevant jurisdiction. Check applicable state and local requirements rather than treating a general uniform guide as the restaurant’s complete compliance policy.
Write clean-clothing expectations, hair restraints, jewelry rules, laundering responsibilities, and replacement procedures into the staff policy. Decoration should not obstruct required protective equipment or turn an unsuitable garment into approved workwear.
Footwear also deserves its own policy. OSHA’s restaurant safety guidance addresses slip and fall hazards and encourages an appropriate work-shoe policy that includes non-slip footwear. This does not establish one universal shoe model for every restaurant. Assess the floors, wet or greasy areas, tasks, local requirements, and workplace safety procedures before defining acceptable footwear.
Restaurant uniform ordering checklist
- Map all FOH, BOH, management, and cross-trained roles.
- Define the brand elements shared across roles.
- Select exact garments and aprons according to tasks and working conditions.
- Confirm colors against the logo, restaurant environment, and laundering process.
- Choose decoration methods using the actual garment and production-ready artwork.
- Approve dimensions and placement with a proof or decorated sample.
- Collect sizes using the current chart for each exact style.
- Set issue quantities from shifts and laundry turnaround.
- Hold sensible new-hire and replacement stock.
- Document product numbers, color names, artwork versions, decoration details, and approved substitutes.
- Check current local food-safety rules and establish a separate footwear policy.
- Reconfirm product, size, and color availability before every repeat order.
Standardize the system, not every employee
A strong restaurant uniform program gives every role an approved, functional way to represent the same brand. Standardize the decisions that protect consistency—garment identity, colors, artwork, decoration, placement, sizing method, and reorder records—while allowing controlled differences for the work each person performs.
Before requesting a final quote, build one complete role kit and review it as it will actually be worn. Check what the apron covers, where tools are carried, whether the employee can move comfortably, and how the logo reads at normal guest distance. Once that kit is approved, record every component. The specification sheet will do as much for long-term consistency as the first decorated order.
References
- Port Authority Rapid Dry™ Polo | Product | SanMar
- Spec Sheet & Measurements | SanMar
- Artwork Tips for Heat Transfers – STAHLS' Blog
- Spec Sheet & Measurements | SanMar
- FDA Food Code 2022: Full Document
- Food Code 2022 | FDA
- eTool : Young Worker Safety in Restaurants – General Hazards | Occupational Safety and Health Administration